- First, install JDK. Click here to know how to install JDK.
- Then visit Maven Official Site and download apache-maven-3.5.3-bin.zip.
- Then unzip this file to any folder.

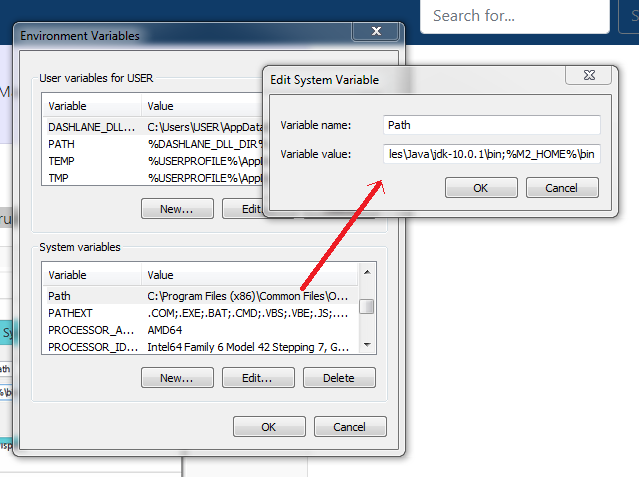
- Goto Control panel -> System -> Advanced System Settings -> Environment Variables. Then add M2_HOME and MAVEN_HOME. Give value of both as the path of the unzipped folder.

- Then update PATH variable, append %M2_HOME%\bin in Path variable, so that you can run the Maven’s command everywhere.

- Then test whether your maven installation is proper by typing mvn -version in command prompt. Then I got an error as shown below.

- To remove this error, add JAVA_HOME. Give the path of your JDK here.

- Then again test whether your installation is proper by typing mvn -version in command prompt. Then I got the message as shown below. Thus I have completed the maven installation successfully.

Home »
» How to Install Maven in Windows
How to Install Maven in Windows
By Anshad June 19, 2018